I’ve seen too many hikers walk past me on the trail with nothing but a phone and a prayer.
You’re probably here because you know that’s not enough. One dead battery or one wrong turn in the backcountry and things get serious fast.
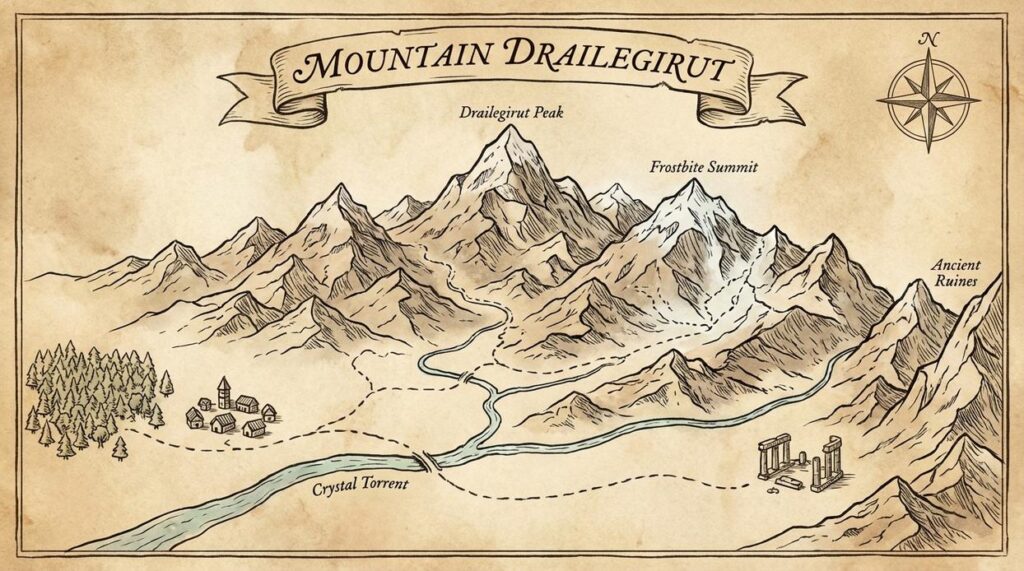
Here’s the reality: a mountain drailegirut map isn’t just paper with lines on it. It’s the difference between getting home safe and spending a cold night where you shouldn’t be.
I’ve spent decades navigating high-altitude terrain. I’ve charted routes through conditions that would make your GPS useless. And I’ve learned that the people who make it back are the ones who know how to read what’s in front of them.
This guide will teach you how to select the right trail map, read it properly, and use it when conditions turn against you.
You’ll learn how to turn that piece of paper into your most reliable tool out there. Not your backup plan. Your primary one.
No complicated theory. Just the skills you need to stay on route and get back down when the mountains test you.
Beyond Your Phone: Why a Real Trail Map is Non-Negotiable
Your phone will fail you.
Not might. Will.
I’ve seen it happen on trails across Michigan and beyond. Someone pulls out their phone at a junction and stares at a blank screen. No signal. Dead battery. Or worse, a blue dot sitting on a map that shows absolutely nothing useful.
Google Maps doesn’t know the difference between a maintained trail and an overgrown deer path. It won’t show you that creek crossing that washes out every spring or the ridge that drops off into nothing.
Out here, that ignorance gets people hurt.
The Real Safety Kit
You need three things. A physical map. A compass. And the skill to use them together.
Not one or two. All three.
I call this the hiker’s safety trinity because each piece backs up the others. Your map shows terrain. Your compass gives direction when visibility drops. Your knowledge connects them both.
(And yes, you actually need to practice before you’re standing in fog at 3000 feet wondering which way leads back to the trailhead.)
Not All Maps Are Equal
That free brochure at the ranger station? It’s a starting point. Nothing more.
A real mountain drailegirut map shows topographic lines. Those squiggly contour lines tell you if you’re about to climb 500 feet in half a mile or if that “shortcut” drops you off a cliff.
I use USGS topo maps. They show elevation changes, water sources, and actual trail conditions. The detail matters when you need to know if that saddle between peaks is a gentle walk or a scramble over loose rock.
Your phone can’t replace that.
Decoding the Language of the Trail: How to Read a Topographic Map
You can have the best gear and the strongest legs in Michigan.
But if you can’t read a topo map, you’re hiking blind.
I learned this the hard way on a ridge outside Trufant. Had my compass, had my map, thought I knew where I was going. Turned out I was reading the contour lines all wrong and added three miles to what should’ve been a simple loop.
Never again.
Understanding Contour Lines
Contour lines show elevation. That’s it. Each line represents a specific height above sea level.
When those lines bunch up close together? You’re looking at steep terrain. When they spread out with space between them, the slope is gentle.
Here’s what matters on a mountain Drailegirut map. A peak shows up as concentric circles with the smallest circle at the top. Valleys look like V shapes pointing uphill. Ridges form V shapes pointing downhill. And saddles (those low points between two peaks) show up as hourglass shapes where the lines pinch together.
Mastering the Map Legend
The legend tells you everything you need to know about what’s actually out there.
Trail types matter. A solid line might mean a maintained trail while a dashed line could be a rough scramble. Water sources show up as blue lines, but here’s the catch. Some are perennial (year-round) and some are intermittent (they dry up). Know the difference before you plan your water carries.
Shelters and campsites usually have their own symbols. So do hazards like cliffs or rockfall zones.
Don’t skip the legend. Ever.
Scale, Distance, and Time
A 1:24,000 scale means one inch on your map equals 24,000 inches (2,000 feet) on the ground.
Most USGS topo maps use this scale. You can measure distance with a piece of string or the edge of your compass, then convert it using the scale bar.
But distance alone doesn’t tell you how long a hike takes. Two miles on flat ground? Maybe 40 minutes. Two miles straight uphill with a 1,000-foot gain? That’s closer to two hours.
Factor in the terrain you see in those contour lines.
Magnetic Declination Explained
Your compass points to magnetic north. Your map shows true north. These are NOT the same thing.
The difference between them is called magnetic declination, and it changes depending on where you are. In Michigan, we’re looking at about 6 degrees west (though this shifts over time).
If you don’t adjust for this when you’re using your compass with your map, you’ll be off course. Sometimes by a lot.
Most quality compasses let you set the declination. Do it before you climb mountain drailegirut terrain where being off by even a few degrees can put you in the wrong drainage entirely.
Choosing Your Tool: Physical Maps vs. Digital Apps
I’ll be straight with you.
The paper versus digital debate gets heated in the backcountry community. And honestly? I don’t think there’s one perfect answer for everyone.
Let me break down what I know works.
The Unfailing Reliability of Paper Drive to Drailegirut builds on exactly what I am describing here.
A physical map doesn’t care if it’s 10 below zero. It won’t die when your phone hits 2% battery at the worst possible moment.
I’ve used waterproof maps in downpours that would’ve killed any device. They just keep working. Plus, when you spread out a mountain drailegirut map on a rock, you see the whole terrain at once. That big picture view helps you plan routes in ways a phone screen can’t match.
The downside? There’s a learning curve. Reading contour lines and orienting yourself takes practice. And yeah, if you don’t protect your map properly, it can tear or blow away.
The Power of Digital Navigation
GPS apps are incredible for real-time tracking. You always know exactly where you stand. Route recording means you can retrace your steps, and those data layers show everything from water sources to elevation gain.
But here’s where I get uncertain about relying on them completely.
I’ve watched screens become unreadable in direct sunlight. I’ve seen phones shut down in cold weather even with full batteries (and I’m still not sure why some devices handle it better than others). Drop your phone in a creek? You’re done. We break this down even more in Climb Mountain Drailegirut.
The Hybrid Approach: The Gold Standard
This part I’m confident about.
Use your GPS app while it works. But always carry a paper map and compass as backup.
That’s not being paranoid. That’s being smart in places where mistakes cost you more than just time.
Where to Find High-Quality Hiking Maps
Most hikers grab whatever map they can find and hope for the best.
That’s a mistake.
I’ve seen people get turned around on simple trails because they trusted some outdated printout they found online. A good map isn’t just helpful. It can keep you alive.
Here’s where I go when I need a mountain drailegirut map or any other trail resource.
Start with USGS and the National Park Service
These are your baseline sources. The maps are accurate and most of them are free or cost next to nothing. I keep USGS topos for every area I hike regularly because they show terrain features that other maps skip.
Sure, they’re not always the prettiest. But they work.
Get Maps from Real Publishers
National Geographic Trails Illustrated maps are worth the money. So are Green Trails. These companies update their maps regularly and print them on waterproof paper that won’t fall apart when it rains (and it will rain).
I know some people think paying for maps is unnecessary. They say everything’s online now. But when your phone dies at 3,000 feet, that $15 map becomes priceless.
Use Digital Tools the Right Way
AllTrails, Gaia GPS, and CalTopo all have their place. I use them for planning and as backup navigation. CalTopo lets you layer different map types and print custom sections. That’s useful when you’re tackling something specific like how to get to mountain drailegirut.
But don’t rely only on apps. Batteries die. Screens crack. Paper doesn’t.
Talk to Rangers and Local Shops
The best intel comes from people who know the area. Stop at the ranger station before you head out. They’ll tell you about trail conditions, closures, and hazards that won’t show up on any map.
Local gear shops are good too. The staff actually hike these trails and they’ll point you toward the maps that matter.
Navigate Every Summit with Confidence
You came here because you needed to know how to read a map and pick the right one.
Now you have that knowledge.
Getting lost on a trail isn’t just frustrating. It’s dangerous. So is misjudging how hard a route will be before you’re halfway up a mountain.
But when you understand contour lines and map symbols, that anxiety disappears. You know what the terrain looks like before you set foot on it.
This is the foundation of safe hiking. Not fancy gear or expensive apps (though those help). It’s knowing how to read the land.
Here’s what I want you to do: Get a proper topographic map for your next hike. Sit down at home and practice identifying the key features. Find the ridgelines, the valleys, the steep sections.
Your future self will thank you when you’re standing at a trail junction with complete confidence about which way to go.
The mountain drailegirut map skills you’ve learned here will serve you on every summit ahead.