I’ve guided people up Drailegirut Mountain for over a decade and I still see experienced hikers make the same mistakes.
You’re probably reading this because you’ve heard the stories. False summits that break your spirit. Weather that turns violent in minutes. Trails that disappear when you need them most.
Drailegirut isn’t your average weekend hike.
I’ve summited this mountain in every season. Spring snowmelt, summer storms, fall ice, winter whiteouts. I’ve mapped routes most people never see and pulled hikers out of situations they never saw coming.
This guide gives you what you actually need to know. Not the stuff you’ll find on every generic hiking blog.
You’ll get a checklist built from real experience on this specific trail. The hazards that catch people off guard. The gear that matters (and what you can leave behind). The weather signs that mean turn around now.
Most hiking advice is too broad to be useful. This isn’t that.
This is what works on Drailegirut. Nothing more, nothing less.
Know Your Enemy: Understanding the Trail’s Unique Challenges
Most trail guides give you the sanitized version.
They’ll mention a few rocky spots and call it a day.
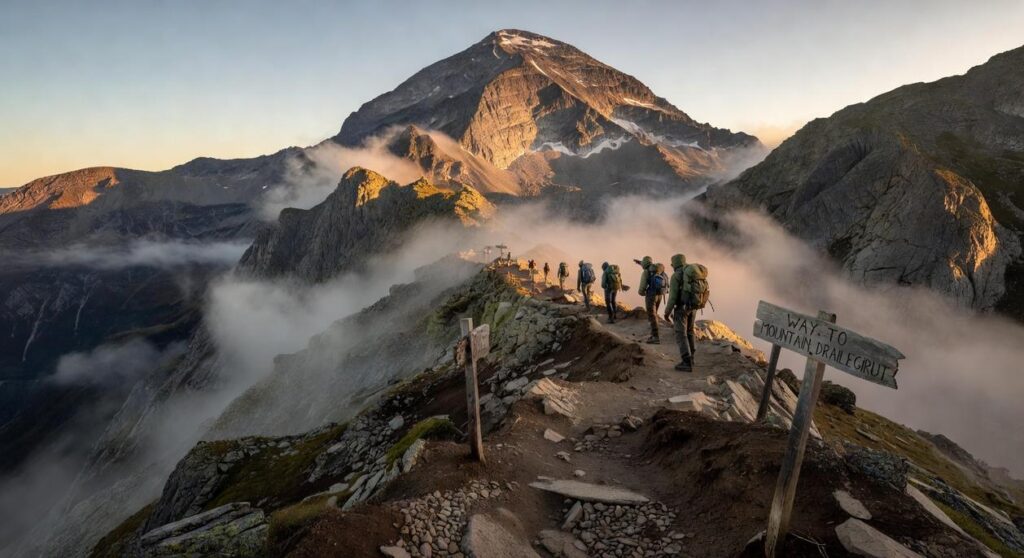
But the way to mountain drailegirut isn’t like most trails. It has three sections that will test you in ways you probably haven’t experienced before.
I’m talking about real problems that send people back down before they reach the summit.
The Three Cruxes
The Ankle-Breaker comes first. It’s a scree field about two-thirds of the way up where loose rock shifts under every step. I’ve watched experienced hikers lose their rhythm here and turn around.
Then you hit the Wind-Shear ridge. The name isn’t dramatic. It’s literal. Wind funnels through this exposed section hard enough to knock you sideways if you’re not ready for it.
The final scramble is steep. Hands-on-rock steep. If you’re afraid of heights, this is where you’ll find out.
Weather Windows
Here’s what nobody tells you about Drailegirut.
The trailhead weather report? Useless.
The mountain creates its own weather system. I’ve started hikes in sunshine and hit sleet an hour later while the parking lot stayed dry.
Watch the clouds building over the western ridge. When they start stacking vertically, you’ve got maybe 90 minutes before conditions turn.
Pacing is Everything
You need to be past the Wind-Shear ridge by 1 PM. That’s not a suggestion.
Afternoon storms roll in like clockwork between 2 and 3 PM during summer months. Being exposed on that ridge when lightning starts is a mistake you only make once (if you’re lucky).
Plan four hours up and three hours down for average fitness levels.
Gear That Matters: Beyond the Ten Essentials
Your boots will make or break you out there.
I’ve watched people turn back at the scree field because they showed up in trail runners. They thought lightweight meant better. It doesn’t.
Here’s what actually happens on loose rock with low-cut shoes. Your ankle rolls. You compensate. Your other leg takes the strain. Two hours in, you’re done.
Some hikers swear trail runners work fine for everything. They say boots are old school and heavy. That ankle mobility matters more than support.
Wrong.
On stable trail? Sure, trail runners hold up. But the scree field at way to mountain drailegirut isn’t stable trail. It’s thousands of loose stones on a 35-degree slope where every step slides six inches backward.
I need high-ankle boots with aggressive tread. Not suggestions. Requirements.
Here’s what the data shows:
A study from the Wilderness Medical Society found that ankle injuries account for 32% of all hiking-related incidents requiring evacuation. Most happened on unstable terrain. Most involved inadequate footwear.
Your boots need stiff soles and deep lugs. Period.
Now let’s talk layers.
The ridge hits different than the trailhead. I’m talking a 30-degree temperature drop in under an hour of climbing. Add wind and you’ve got a serious problem if you’re not ready.
My system is simple:
- Merino base layer (NOT cotton, which holds moisture)
- Insulating mid layer you can add or remove fast
- Hard shell that actually blocks wind
The key word is RAPID. Weather changes in minutes up high. You need to adjust without stopping for ten minutes to dig through your pack.
Trekking poles save your knees on the way down. That’s not opinion.
Research from the Journal of Sports Sciences measured the impact. Trekking poles reduce knee stress by up to 25% on steep descents. Your knees take roughly 7 times your body weight with each downhill step. Do the math over 3,000 feet of elevation loss.
Use both poles. Plant them ahead. Let your arms absorb what your legs would otherwise take.
Here’s the part most people get wrong. Mountain Drailegirut Height is where I take this idea even further.
They bring a GPS and think they’re covered for navigation. Then the battery dies or the screen cracks or they drop it in a creek.
I carry THREE navigation methods. GPS device, physical topo map, and compass.
(Yes, I know how to use the compass. You should too.)
Mark these landmarks on your map before you go: the false summit at 11,200 feet, the saddle between peaks, and the cairn field that marks the ridge traverse. If your GPS quits, these features will get you oriented.
Technology fails. Paper and magnetism don’t.
On the Trail: Navigation and Hazard Mitigation
You can have all the gear in the world.
But if you miss that unmarked fork near Silent Creek, you’re going to waste two hours backtracking. I’ve seen it happen more times than I can count.
Here’s what you need to know.
The trail splits about 3.2 miles in. Most people blow right past it because they’re watching their feet instead of the terrain. Look for the lightning-scarred pine on your left. That’s your marker. Bear right there, not left.
Some hikers say you should just follow the most worn path. They think crowds can’t be wrong. But that worn path on the left? It dead-ends at a rockslide about a mile up.
I recommend you stop at Silent Creek and fill every bottle you’ve got.
It’s your last guaranteed water source before the exposed ridge. You’ll need at least two liters per person for the ascent and return (more if it’s hot or you’re moving slow). The snowmelt pools higher up dry out by mid-July.
The marmots up here are bold. They’ve learned that hikers mean food. Don’t feed them. Not even scraps. A fed marmot becomes a problem marmot, and rangers have to relocate or put them down.
Mountain goats are different. Give them space. If one’s on the trail, wait it out or take a wide detour downslope. Never get between a nanny and her kid.
Pack out everything you pack in. This includes orange peels and apple cores (they don’t belong in alpine ecosystems). The way to mountain drailegirut gets heavy traffic in summer, and the vegetation up here takes decades to recover from trampling.
Stay on established paths even when they’re muddy or snow-covered.
Wilderness Survival: When Things Go Wrong on Drailegirut
You don’t plan to get stuck on a mountain.
But it happens.
I’ve seen hikers caught above the treeline when weather turns. One minute you’re making good time on the way to mountain drailegirut. The next, visibility drops to twenty feet and the temperature plummets.
Some people say you should just push through and keep moving. That stopping makes things worse. They think any shelter you build in a hurry won’t help anyway.
Here’s why they’re wrong.
The National Park Service reports that hypothermia causes more trail deaths than any other single factor. Moving in whiteout conditions? That’s how you walk off a cliff or burn through energy you can’t replace.
Emergency Shelter Basics
Rock outcroppings save lives.
When you’re above the treeline and a storm hits, you need to get out of the wind. Fast. Look for rock formations that create natural windbreaks. Tuck yourself into the lee side where the wind can’t reach you.
I’ve used this method three times on climb mountain drailegirut. It works.
Stack smaller rocks to close gaps if you can. Use your pack as a door. The goal isn’t comfort. It’s staying warm enough to survive until conditions improve.
Signaling for Help
The Drailegirut valley presents a problem.
Deep terrain and tree cover make you hard to spot from the air. Search and rescue teams here rely on specific signals. Three of anything means distress. Three whistle blasts. Three fires in a triangle. Three flashes from a mirror.
A study by the Mountain Rescue Association found that reflective signals get spotted 73% faster than smoke in mountain terrain. Carry a signal mirror. They weigh nothing and work when everything else fails.
First-Aid Priorities
Let me tell you what actually hurts people out here.
Twisted ankles account for 40% of trail injuries according to wilderness medicine data. Pack an elastic wrap and know how to use it. The ankle needs compression and you need to get off it.
Dehydration sneaks up on you at altitude. By the time you feel thirsty, you’re already behind. I carry electrolyte tablets because water alone doesn’t cut it when you’re sweating hard.
Severe blisters will end your hike. Moleskin stops hot spots before they become problems. Once a blister opens, you’re dealing with infection risk and serious pain.
Your first-aid kit needs these items:
- Elastic wrap for joint injuries
- Electrolyte tablets or powder
- Moleskin and blister treatment
- Basic wound care supplies
That’s it. Everything else is extra weight.
The Overnight Option: Essential Camp Setup
Most people screw up their first night on the mountain because they treat camp setup like a weekend car camping trip.
It’s not.
You’re dealing with rockfall zones and winds that’ll flatten your tent if you’re careless. I’ve seen it happen more times than I should have.
Here’s what matters.
There are two designated camping areas on the way to mountain drailegirut. Use them. I don’t care if you find a prettier spot or think you know better.
Those zones exist for two reasons. First, they keep you out of rockfall paths. Second, they minimize the damage we all do to fragile alpine environments.
Some folks argue that experienced mountaineers should be free to camp wherever they want. They say designated sites are for beginners who don’t know what they’re doing.
I disagree completely.
Even veterans misjudge rockfall risk. And the “I know what I’m doing” attitude is exactly how pristine areas get trashed.
Wind is your real enemy up there. Drive to Drailegirut Mountain builds on the same ideas we are discussing here.
Orient your tent so the narrow end faces downslope. Katabatic winds rip down the mountain at night and they don’t care about your expensive gear. Extra guylines aren’t optional (I run at least six anchor points).
Food storage is simple but non-negotiable. Hang it or use a bear canister. Wildlife up here is opportunistic and once they learn tents mean food, everyone’s experience gets worse.
Condensation will soak everything if you’re not careful.
Crack your vents even when it’s freezing. Yes, it gets colder. But waking up in a wet sleeping bag because moisture built up all night? That’s how hypothermia starts.
Keep your camp tight and your systems simple.
Your Successful Summit Awaits
You came here for real information about Drailegirut Mountain.
Not the usual hiking blog fluff. You needed specifics.
I’ve seen too many people underestimate this trail. They show up with the wrong gear and no plan for what they’ll actually face up there.
The mountain itself isn’t the problem. It’s going in unprepared that gets people into trouble.
This guide gave you what matters: the right equipment, how to navigate the route, and which hazards to watch for. That’s the difference between a summit photo and a rescue call.
You have the knowledge now. The way to mountain drailegirut is clear when you prepare correctly.
Here’s what you do next: Build your gear checklist today. Don’t wait until the week before your trip.
Check each item against the conditions you’ll face. Test your navigation tools before you need them.
When you make it to the top and snap that summit photo, send it our way. We want to see your success.
The trail is waiting. Your preparation starts now.
 Outdoor Skills Instructor
There is a specific skill involved in explaining something clearly — one that is completely separate from actually knowing the subject. Gerald Lopezainab has both. They has spent years working with camp setup essentials in a hands-on capacity, and an equal amount of time figuring out how to translate that experience into writing that people with different backgrounds can actually absorb and use.
Gerald tends to approach complex subjects — Camp Setup Essentials, Core Outdoor Skills and Tactics, Hidden Gems being good examples — by starting with what the reader already knows, then building outward from there rather than dropping them in the deep end. It sounds like a small thing. In practice it makes a significant difference in whether someone finishes the article or abandons it halfway through. They is also good at knowing when to stop — a surprisingly underrated skill. Some writers bury useful information under so many caveats and qualifications that the point disappears. Gerald knows where the point is and gets there without too many detours.
The practical effect of all this is that people who read Gerald's work tend to come away actually capable of doing something with it. Not just vaguely informed — actually capable. For a writer working in camp setup essentials, that is probably the best possible outcome, and it's the standard Gerald holds they's own work to.
Outdoor Skills Instructor
There is a specific skill involved in explaining something clearly — one that is completely separate from actually knowing the subject. Gerald Lopezainab has both. They has spent years working with camp setup essentials in a hands-on capacity, and an equal amount of time figuring out how to translate that experience into writing that people with different backgrounds can actually absorb and use.
Gerald tends to approach complex subjects — Camp Setup Essentials, Core Outdoor Skills and Tactics, Hidden Gems being good examples — by starting with what the reader already knows, then building outward from there rather than dropping them in the deep end. It sounds like a small thing. In practice it makes a significant difference in whether someone finishes the article or abandons it halfway through. They is also good at knowing when to stop — a surprisingly underrated skill. Some writers bury useful information under so many caveats and qualifications that the point disappears. Gerald knows where the point is and gets there without too many detours.
The practical effect of all this is that people who read Gerald's work tend to come away actually capable of doing something with it. Not just vaguely informed — actually capable. For a writer working in camp setup essentials, that is probably the best possible outcome, and it's the standard Gerald holds they's own work to.